Art of Russian Manicures A Guide to Perfectly Polished Nails
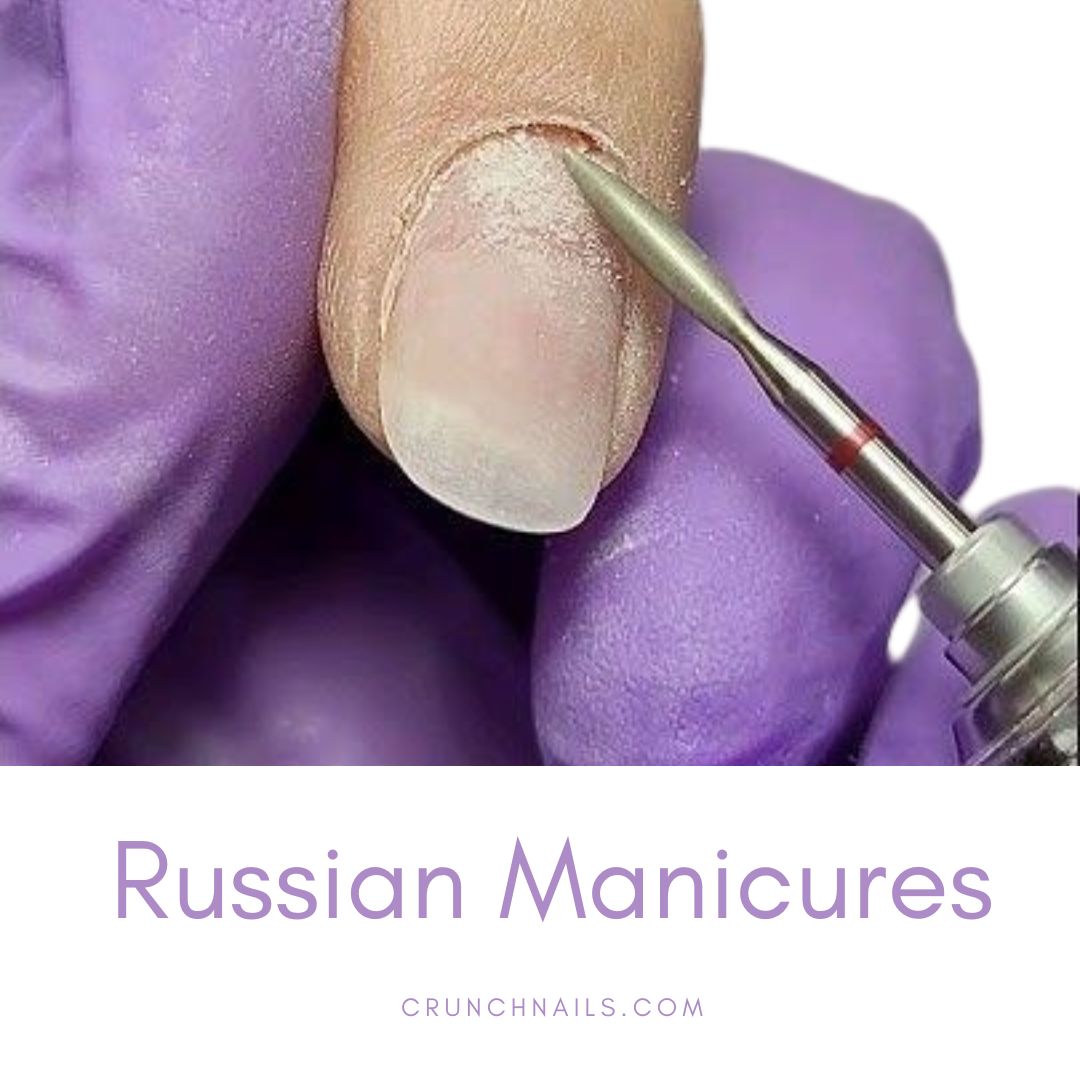
I’ve been working in the nail industry for a long time, and I’ve seen many beauty trends come and go. But one technique that really stands out to me is the Russian Manicure. It’s become a favorite for many people around the world, and it’s easy to see why. This method gives beautiful, clean results and lasts a lot longer than other manicures. Art Of Russian Manicures I talked to some experts, like dermatologist Hadley King and cosmetic chemist David Petrillo, to get their thoughts on the Russian Manicure. They explained that it’s all about carefully shaping the nail and following a special nail care routine. This technique not only makes your nails look amazing, but it also helps keep them healthy. Kamola Malikova, the founder of Minx Nails, agrees, saying Russian Manicures are perfect for people who want something stylish without too much upkeep. Dry Russian Manicure If you’re into beauty or just starting to take care of your nails, Russian Manicures are definitely worth trying. With plenty of online tutorials, it’s easier than ever to get salon-quality results at home. And with a good nail care routine, your Russian Manicure can last for weeks. Just be sure to check in with a professional to get the best outcome! What Are Russian Manicures? View this post on Instagram A post shared by Nail art 💅 Manicure (@nails_by_steps) If you’re interested in nail care, you might have heard of Russian manicures. This technique is also called dry manicure or electric file manicure. It uses an electric drill bit to gently shape your nails and trim your cuticles without water. Experts like Petrillo and Malikova say this method is effective and good for your nail health. Unlike gel manicures or acrylic tips, Russian manicures are a simple 5-7 step process that doesn’t need water. Russian manicures got their name from the precise and polished work of Russian nail technicians. This technique requires skill and attention to detail, which is why it’s also called an E-file manicure. With Russian manicures, you can get salon-quality results at home. By combining nail shaping and nail filing, Russian manicures give you long-lasting and beautiful nails perfect for any occasion. Whether you’re new to nail care or a seasoned pro, Russian manicures are worth trying. The Process Behind a Russian Manicure View this post on Instagram A post shared by Katalina beauty lab (@katalina.beauty.lab) A Russian Manicure is a special way of taking care of your nails. Unlike traditional nail salons, it doesn’t involve soaking your hands in water. Instead, electric nail bits are used to gently trim and clean your cuticles. Malikova explains that this process has three main steps: cleaning the nail bed, removing the cuticle, and polishing the nail to create the perfect shape. Next, a special base coat is applied based on your nail strength and nail length. Then, a gel polish is carefully applied using an artist brush. NailmArtUsa says that using quality gel polish is crucial for a long-lasting finish. The entire process takes about two to three hours, but the result is well worth the time. What makes Russian Manicures unique is that they’re tailored to your individual needs. By customizing the nail care process, nail technicians can give you the perfect long-lasting manicure. Whether you want healthy nails or just a beautiful look, Russian Manicures are a great choice. Are Russian Manicures Safe? Russian Manicures have become popular, but experts like Petrillo warn about potential risks. The American Academy of Dermatology advises against removing cuticles, as it can lead to infection and damage to the nail root. In fact, some states prohibit drilling off cuticles due to safety concerns. When you trim or cut your cuticles, it’s easier for bacteria and germs to enter your body, causing infection. To maintain good nail health and nail safety, consider alternative methods that promote nail hygiene and nail protection. If you care about beauty standards, weigh the risks and benefits of Russian Manicures and consult with nail technicians and nail salon professionals. Potential Risks of Russian Manicures Nail Damage Russian manicures can harm your nails. Expert Petrillo says that using an electric file too much or at high speed can cause nail breakage, nail splitting, or nail peeling. This weakens your nails, leading to nail damage. To avoid this, choose a skilled nail technician who files gently. Skin Damage Russian manicures can also harm your skin. Petrillo warns that improper use of an electric drill bit can cause skin damage, irritation, or cuts. This is especially concerning if you have sensitive skin. Pain or Discomfort You might feel pain or discomfort during a Russian manicure. Petrillo says this happens when the drill bit is used too aggressively or incorrectly, especially if you have sensitive skin or sensitive nails. Increases Infection Russian manicures can also increase the risk of infection. Expert King explains that the cuticle protects your nail from bacteria. If the cuticle is damaged, you’re more likely to get an infection. Before getting a Russian manicure, consider these potential risks. Choose a skilled nail technician to minimize risks and enjoy a safe nail care experience. What to Consider for a Russian Manicure If you want a Russian Manicure, find a skilled nail technician with lots of experience. Expert Malikova suggests choosing technicians from reputable nail schools like Profi Nails with at least two to three years of experience. Also, look for licenses and diplomas. A good technician prioritizes nail health, uses safe non-toxic gel polishes, and avoids harmful acrylic extensions. A Russian Manicure has many benefits. Unlike other manicures, it focuses on nail health, making your nails strong and healthy. Your Russian Manicure will last up to five weeks without needing a touch-up. Malikova says it looks great and protects your nails. By choosing the right technician and taking care of your nails, you’ll enjoy a beautiful and healthy Russian Manicure.