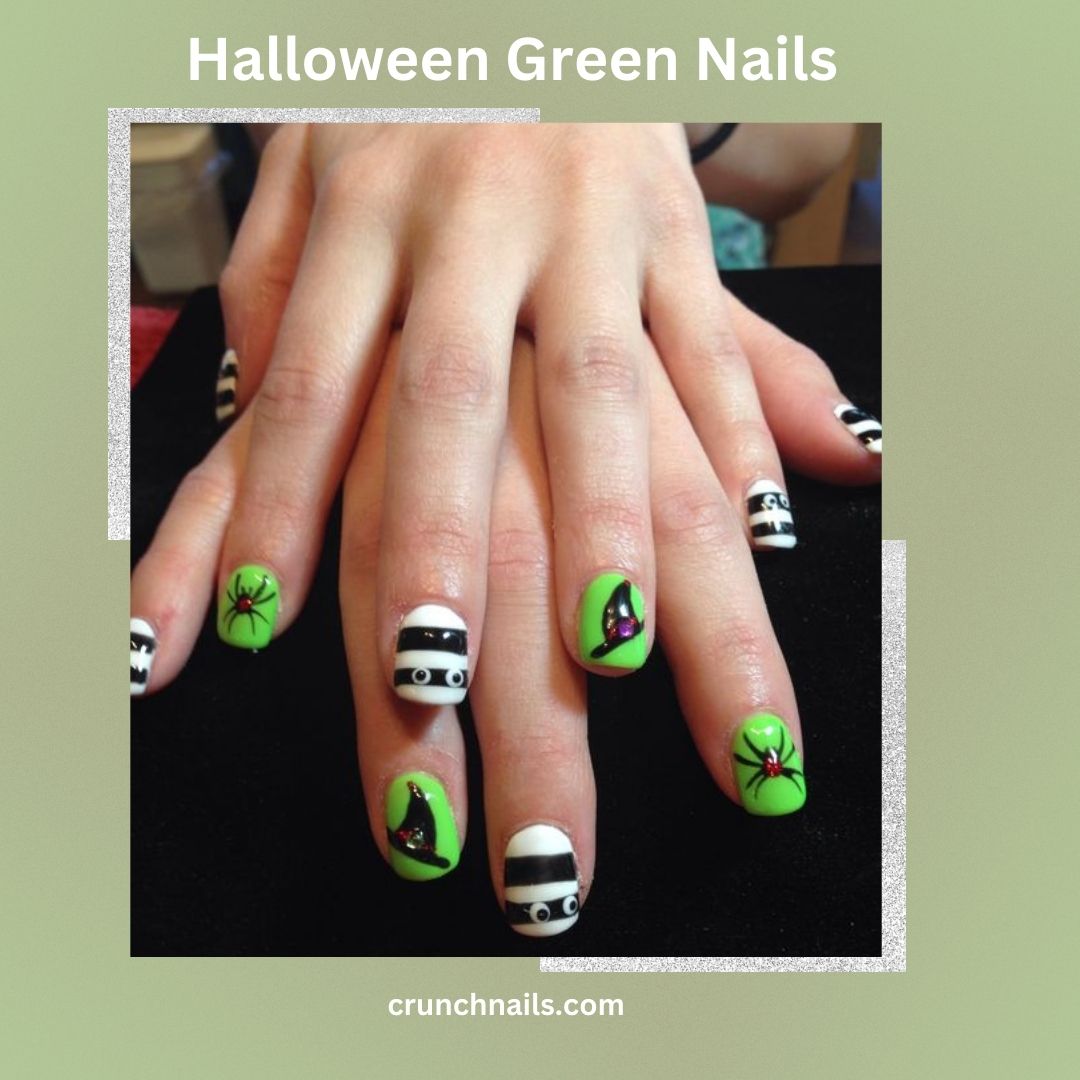
Get Ready for Spooky Halloween Green Nails!
Green nails are a classic Halloween look that’s perfect for the season. This year, try something new and exciting with unique designs.
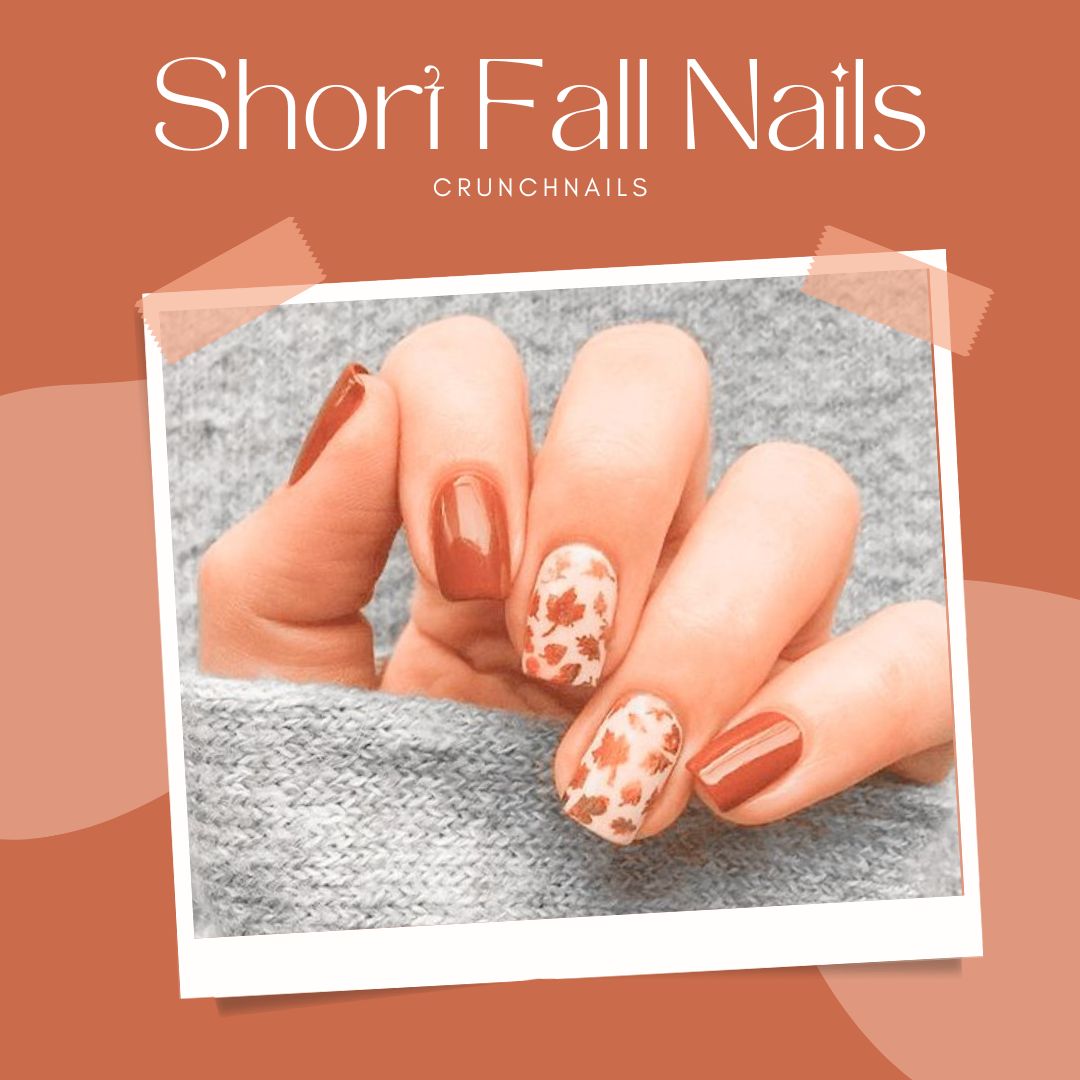
As summer ends and fall begins, we like to change up our nail style. This season, try something new: Short Fall Nails!
French tips are a classic nail style, but why stick to the usual white? Try something new and edgy with black and silver tips! This modern twist is perfect for adding a touch of glam to your look.
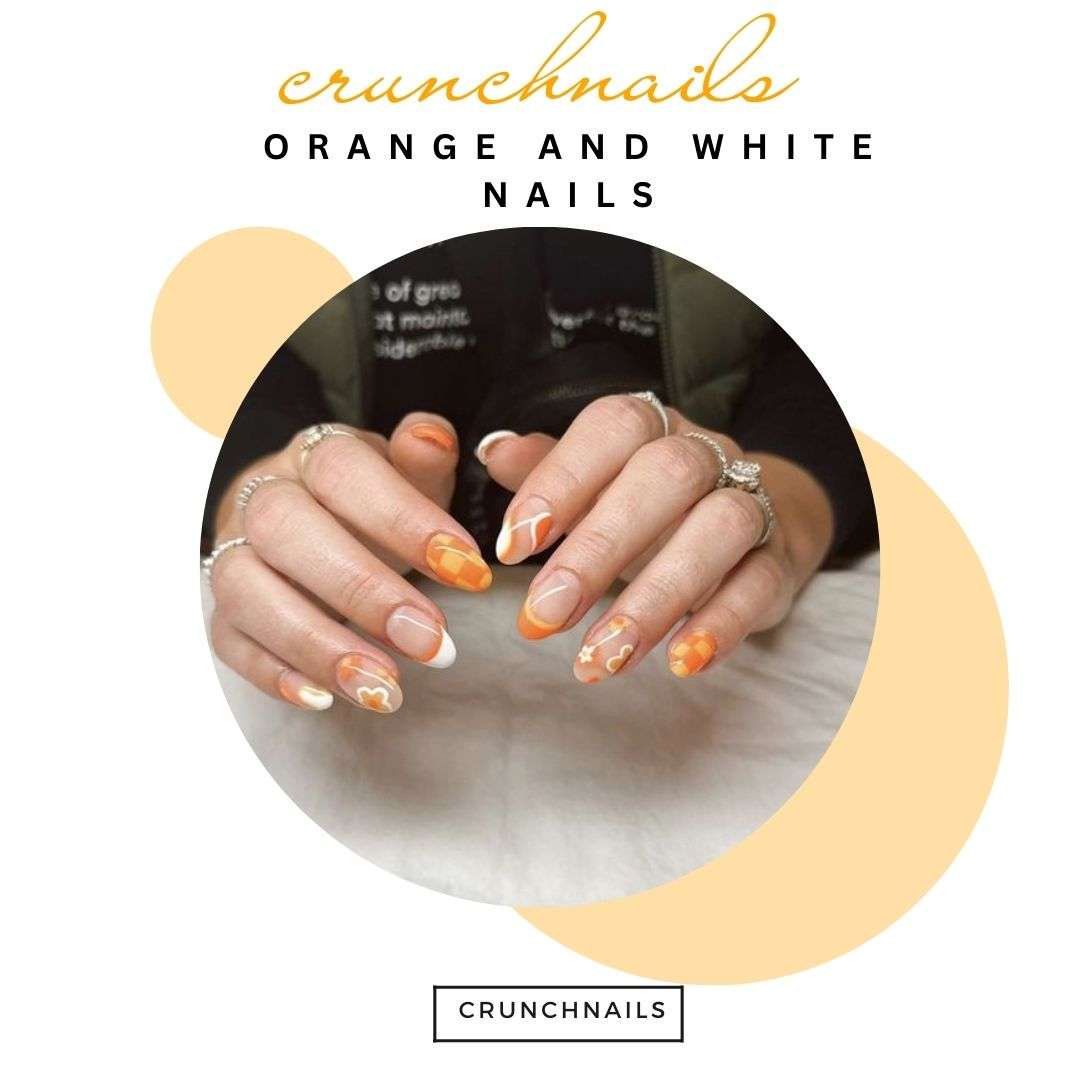
Orange and white nails are a classic combination that never goes out of style. You can make it look modern by trying different shades and finishes. For example, pair bright orange with creamy white for a playful look, or use pastel orange with crisp white for a subtle look. Get Creative Orange and white nails are a great canvas for nail art. You can add stripes, dots, or even bold patterns. It’s a fun way to express yourself through your nails. 18+ Orange And White Nails We’ll share our favorite orange and white nail designs. You’ll find simple and elegant ideas, as well as bold and playful ones. Whether you’re new to nail art or a pro, you’ll find inspiration to create your own unique look. French Tip with a Twist To create this unique nail art, start with a clean white base coat. Once dry, carefully apply orange polish to the tips for a stylish twist that brightens up your look. Orange and White Ombre Start with a base coat. Apply orange polish on the tips and gradually blend it into white as you move towards the cuticle. Finish with a top coat for a glossy look. Orange and White Chevron The design features a diagonal chevron pattern that alternates between orange and white colors. This vibrant combination creates a striking visual effect that can enhance any nail art. Orange and White Polka Dots Create a fun nail art design using orange and white polka dots. Start by painting your nails with a base coat of your choice, then let it dry completely. Use a dotting tool or a toothpick to apply random dots of orange and white on each nail, mixing the colors for a playful look. Orange and White Stripes Create a nail art design featuring alternating orange and white stripes. You can choose to paint the stripes either vertically or horizontally on your nails for a fun and vibrant look. Orange and White Floral Orange and white floral patterns feature beautiful designs that combine these two vibrant colors. These floral motifs can add a fresh and lively touch to any artwork or decoration. Orange and White Marble Finish the design with a top coat to add shine and durability. You can also add some glitter or small gems for extra flair. This simple technique will give your nails a unique and eye-catching appearance. Orange and White Tie-Dye Finish the look with a top coat to add shine and durability. You can also add some glitter or small gems for extra flair. This fun design is perfect for summer or any occasion where you want to show off your creativity. Orange and White Geometric Experiment with different designs by mixing the shapes and varying their sizes. You can also add a glossy top coat to enhance the look and make the colors pop. This simple yet striking design will give your nails a modern and stylish appearance. Orange and White Glitter Use orange and white glitter to add sparkle to your nail art. These colors can create a fun and vibrant look that stands out. Orange and White Negative Space Start by painting your nails with a base coat of white. Then, use orange polish to create bold shapes or lines, leaving some areas unpainted to emphasize the negative space. This combination will give your nails a fresh and modern appearance. Orange and White Half Moon Create a half-moon design using orange and white colors. You can choose to paint the half-moon shape in either orange or white for a striking look. Orange and White Watercolor Consider adding some details like gold or silver accents. You can use a thin brush to draw delicate lines or shapes over the watercolor background. Finish with a top coat to seal your artwork and give it a glossy finish. Enjoy your unique and creative nail art! Orange and White Matte Finish To create a unique nail art design, start with a base coat of orange and white matte polish. You can use tools like dotting pens or brushes to add patterns or shapes, enhancing the overall look with creativity and flair. Orange and White Chrome Orange and White Chrome A shiny chrome effect for a striking metallic look. Shell-Inspired Nail Art Embrace the beauty of orange and white colors to create stunning nail designs. Use these shades to mimic the look of seashells, adding a touch of the beach to your nails. Orange and White Sunburst Want to add some sunshine to your nails? Follow these easy steps! Step 1: Prep Your Nails Apply a special coat to your nails to make them smooth. Step 2: Paint the Sunburst Use a small brush or a nail art tool to paint lines that go out from the center of your nail. Switch between orange and white colors to make it look like a sunburst. That’s it! You now have a bright and cheerful sunburst design on your nails using orange and white colors.” Orange and White Aztec Patterns inspired by Aztec culture. These designs often feature geometric shapes and vibrant colors that create a striking visual effect. Orange and White Leopard Print Step 1: Paint Your Nails White Use white nail polish to paint your nails. This will be the background for your design. Step 2: Add Orange Spots Use a small brush or a special tool to add orange spots on top of the white polish. Make the spots look like a leopard’s fur – random and playful! Orange and White Ombre with Glitter Step 1: Blend Orange and White Use nail polish to blend orange and white colors together. Start with white at the tip of your nail and gradually add more orange towards the cuticle. This creates a beautiful gradient effect. Step 2: Add Sparkle Use glitter polish to add some sparkle to your nails. You can add a little glitter on top of the orange and white blend or use it to create a glittery accent … Read more
Do you want a nail design that’s both stylish and eye-catching? Try the Red and Silver French Tip Nails! This classic design is now even more beautiful with silver accents. It’s perfect for special occasions or just a pampering session. The French tip design is a timeless favorite, and pairing it with bold red polish and sleek silver accents creates a sophisticated look. The silver tips add a touch of glamour, making this design perfect for a luxury manicure. You can make this look even more dramatic with a chrome finish or glitter accents. If you’re feeling bold, try an ombre or striped design for a unique twist. 13+ Red and Silver French Tip Nails This Red and Silver French Tip Nails Manicure is a must-try for anyone who wants to upgrade their nail style. It’s a perfect mix of classic and modern elements that’s sure to impress. So why not give it a try and experience the glamour for yourself? Red And Silver Glitter To achieve this style, start with a base coat, then apply red polish on the tips. Finish with silver glitter for a dazzling effect. Red and Silver Chrome Focus on smooth finishes and vibrant colors. This approach enhances the overall aesthetic, making it appealing and memorable. Red and Silver Marble Carefully blend red and silver polish at the tips of your nails for a stunning effect. Use a gentle touch to create a smooth transition between the colors. Red and Silver Ombre Start with a red base coat and let it dry. Then, use a sponge to dab silver polish on the tips, blending it gently into the red for a smooth transition. Finish with a top coat for shine. Red and Silver Rhinestones Consider using these rhinestones in a creative way. Placing them in specific patterns can elevate your nails and give them a stunning finish. Red and Silver Foil Start by applying a base coat. Then, carefully place the red and silver foil on your nails, ensuring even coverage for a stunning finish. Red and Silver Negative Space Focus on clean lines and strategic placement of color. The unpainted spaces should enhance the overall design, making it feel fresh and modern. Red and Silver Floral This design is soft and romantic, showcasing beautiful floral patterns at the tips. It adds a feminine touch to any look. Red and Silver Leopard Print To achieve a polished look with this design, focus on clean lines and even application. Ensuring the wild pattern stands out beautifully. Red and Silver Checkerboard Consider using a manicure style that reflects its playful nature. Incorporate similar colors and shapes in your nail art for a cohesive and eye-catching look. The Red and Silver Tie-Dye The Red and Silver Tie-Dye pattern is a stylish and vibrant choice that brings a bohemian feel to any outfit. Its eye-catching colors make it a popular design for those looking to express their individuality. Red and Silver Hearts Adding personal touches that reflect your style. Incorporating unique elements can make your Valentine’s Day celebration even more special and memorable. Red and Silver Snowflakes Focus on the details of the snowflake patterns. Use a steady hand and vibrant colors to enhance the festive feel, making your design truly stand out. Red And Silver Fireworks Red and silver fireworks create a joyful and festive look, perfect for celebrations and special events. Their vibrant colors add excitement and a sense of occasion to any gathering. Red And Silver Candy Stripes Red and silver candy stripes create a cheerful and lively look that brings a sense of joy. This design adds a delightful sweetness to any setting.
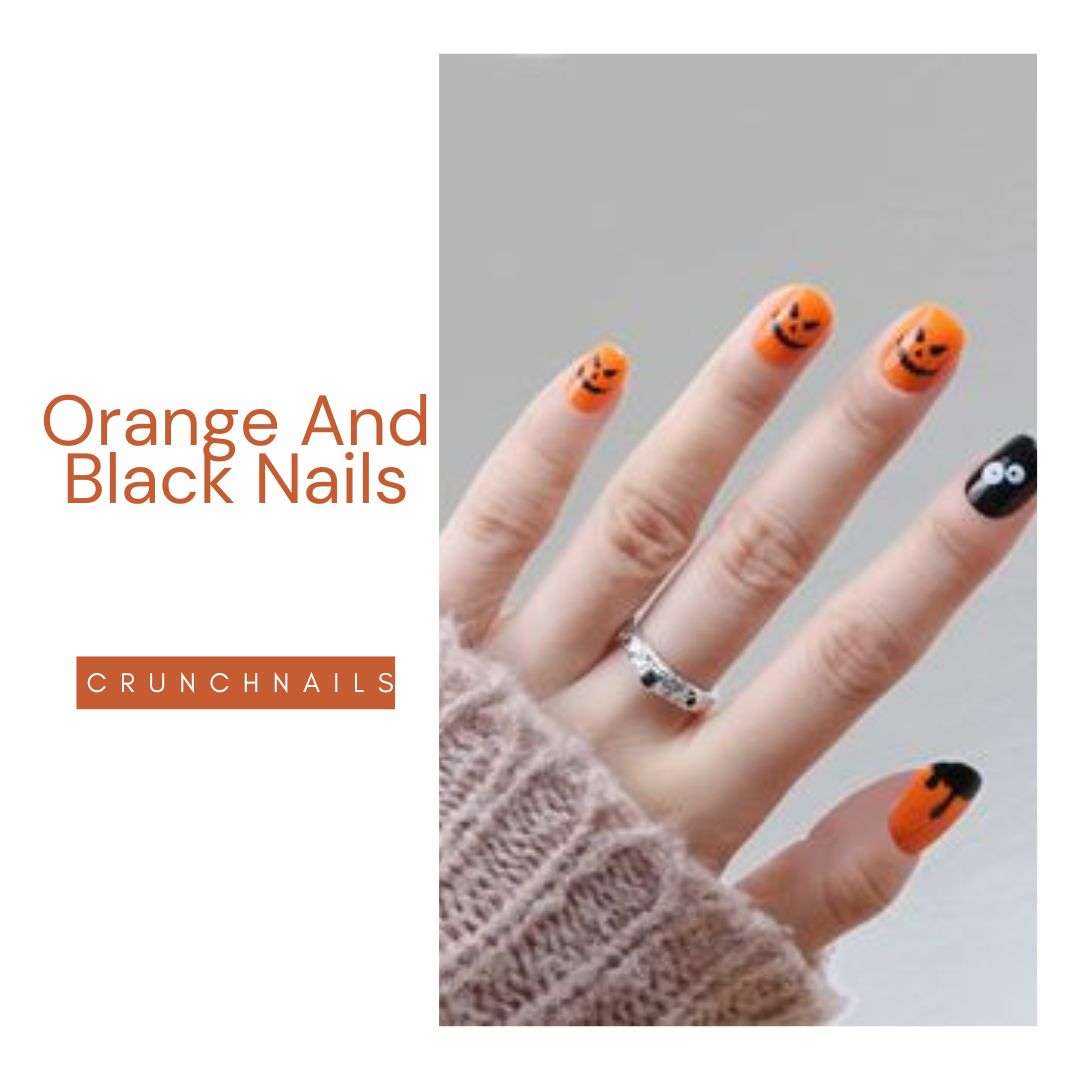
Do you want to try a new and exciting nail art design? Try Orange and Black Nails! This look is perfect for fall and Halloween, but you can wear it anytime for a chic and edgy style. How to Create This Look First, put a clear coat on your nails. Then, paint a bright orange color on your nails. Next, add black stripes or designs. You can use stickers or guides to make straight lines, or try drawing freehand. Make it Fancy Want to add some extra flair? Try swirling orange and black together, or add some glitter or rhinestones. Finally, put a clear coat on top to seal it all in. 20 Orange and Black Nails That’s it! With these easy steps, you can create a bold and beautiful Orange and Black Nails look. Try it out and have fun!” Orange With Black Tips Orange paired with black accents creates a stylish and striking appearance. This combination is both classic and eye-catching, making it a popular choice for many. Black Base With Orange Accents A black background with orange highlights offers a fresh take on the traditional French manicure. This design combines elegance with a bold pop of color, making it stand out. Orange And Black Checkerboard This pattern, with its bright orange and deep black squares, adds a fun touch. It can easily brighten up a room or an outfit. Orange And Black Stripes Orange and black stripes represent a traditional style that is straightforward to implement. This classic look is popular and can be used in many different ways. Orange And Black Ombre The combination of orange and black creates a beautiful gradient that is both trendy and attention-grabbing. This ombre effect stands out and adds a unique touch to any design. Orange And Black Leopard Print With its vibrant colors, orange and black leopard print offers a daring and unique appearance. It brings an element of excitement and flair, making it a popular choice for those who want to make a statement. Orange And Black Halloween Designs Halloween designs in orange and black are ideal for the spooky time of year. These colors capture the essence of the holiday and create a festive atmosphere. Orange And Black Floral Designs Floral patterns in orange and black create a soft and romantic style. Orange And Black Abstract Art This combination of orange and black creates an expressive visual experience. The artwork stands out, showcasing originality and emotion through its unique patterns and shapes. Orange And Black Geometric Designs The combo of orange and black in geometric shapes offers a sleek and minimalistic aesthetic. This look is perfect for those who appreciate clean lines and bold colors in their decor. Orange And Black Watercolor Nails This style offers a soft, dreamy vibe that stands out beautifully. It’s a perfect choice for those who want to add a creative flair to their nails. Orange And Black Galaxy Nails Orange and black galaxy nails create a stunning and unique appearance. This design gives a space-inspired vibe that feels both magical and mysterious. Orange And Black Polka Dots Orange and black spots create a fun and charming appearance. This combination adds a lively touch to any outfit or design. Orange And Black Glitter Using orange and black glitter gives a vibrant and shiny effect. It’s perfect for making a bold statement and enhancing the overall look with a bit of flair. Orange And Black Flames To achieve creative nail art with orange and black flames, start by painting your nails with a base color. Then, use a fine brush or nail art tools to add flame designs in orange and black. This technique will help you create a stunning effect that showcases your artistic skills and adds excitement to your overall style. Orange And Black Hearts To achieve creative nail art with these colors, consider painting orange hearts on a black background or vice versa. You can also add some glitter or patterns to make your design even more unique and eye-catching. Orange And Black Skull Designs You can use orange and black nail polish to paint skull designs. Adding details like glitter or gems can enhance the overall look and make your nails stand out even more. Orange And Black Spikes Consider using orange and black nail polish along with spike decorations. You can paint your nails in alternating colors or create unique patterns. Adding spikes will enhance the punk aesthetic and make your nails truly eye-catching. Orange And Black Chains Think about unique designs that incorporate both shades. You can use patterns or shapes that reflect the boldness of orange and black chains for a fun and stylish look. Orange And Black Camouflage Consider using various techniques like sponging or striping. You can create fun designs that reflect the camouflage theme, making your nails stand out in a stylish way.
Do you want to try a new and exciting nail art design? Try Orange Ombre Nails! This look is perfect for fall and is easy to create. Get Started To make Orange Ombre Nails, you need a few simple things. First, put a clear coat on your nails. Then, paint a light orange color on your nails. Next, use a sponge or special tool to blend a darker orange color towards the tips of your nails. Finally, put a clear coat on top to make your nails shine. Make it Look Great To make your nails look great, blend the colors carefully. You can also add some subtle shading or glitter to make your nails look extra special. Don’t worry if it’s your first time trying nail art – just have fun and practice! 19+ Show Off Your Style With these easy steps, you can create beautiful Orange Ombre Nails. So why not give it a try? Be creative, have fun, and show off your unique style! Orange and Gold Ombre Nail Orange and gold are two colors that complement each other perfectly to create a rich and elegant aesthetic. The vibrant hue of orange brings energy and warmth, while the shimmering gold adds a touch of sophistication and opulence. Orange and Pink Ombre Nail Combining orange and pink offers a lively and soft vibe, making it a great choice for warmer months. This delightful color duo adds a refreshing touch to your style, perfect for enjoying sunny days. Orange and Teal Ombre Nail The vibrant contrast between orange and teal is eye-catching and unique. It’s a combination that can easily draw people in and spark interest. Orange and Purple Ombre Nails The mix of orange and purple creates a lively and striking look that is ideal for an evening event. This bold pairing stands out and adds excitement to any outfit. Orange and Brown Ombre Nails Orange and brown create a warm and natural look that is ideal for autumn. This color pairing brings to mind the changing leaves and cozy vibes of the season. Orange and White Ombre Nail Orange and white create a fresh and timeless look that suits any event. This pairing is both bright and elegant, making it a great choice for various settings. Orange and Black Ombre Nails Orange and black together form a powerful and stylish combination that suits the Halloween vibe perfectly. This duo of colors brings a fun yet spooky atmosphere, perfect for festive decorations and costumes. Orange and Blue Ombre Nail Using orange and blue together offers a cheerful and spirited vibe, making it a great choice for warm weather. This color combination can easily uplift any atmosphere. Orange and Green Ombre Nail Orange and green create a fresh and natural look that is ideal for the spring season. This pairing brings a sense of warmth and vitality, making it a great choice for outdoor activities and gatherings. Orange and Grey Ombre Nail Orange and grey create a stylish and contemporary mix that suits any event. This pairing brings a fresh and elegant look to various settings. Orange and Glitter Ombre Nail Orange and sparkle create a stylish and cheerful mix that is ideal for the holiday season. This vibrant pairing brings joy and excitement to any celebration. Orange and Nude Ombre Nails Orange and nude ombre nails create a simple and elegant look that is great for daily use. This style blends warm tones in a way that feels both fresh and subtle. Orange and Red Ombre Nails The blend of orange and red shades gives a warm and energetic vibe. It’s a great choice for anyone looking to make a statement with their nail design. Orange and Yellow Ombre Nails A sunny and cheerful combination that is perfect for summer. Orange and Silver Ombre Nails A metallic and glamorous combination that is perfect for a special occasion. Orange and Navy Ombre Nails A bold and sophisticated combination that is perfect for fall. Orange and Lavender Ombre Nails A romantic and feminine combination that is perfect for spring. Orange and Turquoise Ombre Nails A vibrant and tropical combination that is perfect for summer. Orange and Beige Ombre Nails A natural and understated combination that is perfect for everyday wear. Orange and Champagne Ombre Nails A luxurious and festive combination that is perfect for New Year’s Eve.
One of the most beautiful and delicate nail art designs is the Blue Flower Nails Art. This style is perfect for anyone who wants to add a touch of elegance and charm to their look. The best part about this design is that it can be customized to fit your personal style. You can choose from a variety of blue shades, from light sky blue to deep navy blue. The flowers can be big or small, simple or intricate. What makes this design special is the way it combines art and skill. Nail artists use special tools and techniques to create beautiful flowers that look like they’re blooming on your nails. 18+ Blue Flower Nails If you want to try this look, don’t worry if you’re new to nail art. We’ll show you how to create your own Blue Flower Nails Art with easy-to-follow tutorials and tips. Get ready to make your nails bloom with beauty! Watercolor Blue Flowers Start with a light blue base coat. Use a sponge to dab on different shades of blue and white to create a watercolor look. Blend while the polish is still wet. 3D Blue Flowers Paint your nails with a solid blue color. Once dry, use acrylic paint or gel to add 3D flowers. Place small rhinestones in the center of each flower. Negative Space Blue Flowers Paint your nails with a nude or clear base coat. Use nail tape to cover parts of your nails, then paint over it with blue polish. Remove the tape to reveal the negative space with blue flowers. Make sure the base coat is dry before applying tape. Blue Flower Stamping Apply a light blue base coat. Use a stamping plate with flower designs and a contrasting blue polish to stamp flowers onto your nails. Finish with a top coat. Blue Ombre with Flower Tips Create a gradient from dark blue to light blue on your nails. Once dry, paint delicate flowers at the tips of your nails. Blend the gradient with a sponge for a smoother look. Blue Floral French Tips Apply a pale blue base coat. Paint blue flowers on the tips of your nails using a fine brush or stencil. Use striping tape to guide the edge of the French tips for a clean line. Blue and Gold Flower Foil Start with a blue base coat. Once dry, apply small pieces of gold foil in flower shapes onto your nails. Seal with a top coat. Use tweezers to place the foil without wrinkling it. Blue Floral Gradient Apply a gradient of different blue shades on your nails. Add small floral details in a contrasting color. Blue Floral Matte Finish Paint your nails with a glossy blue polish. Once dry, apply a matte top coat. Add glossy blue floral designs on top for contrast. Blue Flowers with Dotting Tools Apply a blue base coat. Use dotting tools to create flower petals and details with different shades of blue and white. Practice on paper first to get a feel for the dotting tool. Blue and White Floral Gradient with Glitter Create a blue gradient on your nails. While the gradient is still wet, sprinkle some glitter on top. Hand-Painted Blue Water Lilies Paint your nails with a soft blue base. Use a fine brush to paint detailed blue water lilies. Build up the details slowly for the best results. Blue Floral Confetti Apply a clear or nude base coat. Place blue floral confetti or stickers on your nails. Finish with a top coat. Use a clear polish to gently press the confetti in place. Blue Marble with Flowers Create a marble effect using different shades of blue. Once dry, add small blue flowers on top. Apply flowers carefully to avoid disturbing the marble effect. Blue Floral Stripes Apply a blue gradient. Add horizontal or vertical stripes with floral patterns in a contrasting color. Blue Floral Accents on Clear Base Paint most nails with a clear base coat. Apply blue flower decals on one or two accent nails. Seal the decals with a top coat to keep them from peeling. Blue Floral Galaxy Create a galaxy effect with blues, purples, and blacks. Add small blue flowers to enhance the galaxy look. Use a sponge to apply the galaxy colors for a blended effect. Blue Flower French Manicure Paint a classic French manicure with blue tips. Add small blue flowers along the tips. Blue Floral Accent Nails Paint all nails with a solid blue color. Choose one or two nails to add intricate blue flower designs. Keep accent nails simple to let the flowers stand out. Blue Flowers with Negative Space Apply a light blue base. Use tape to leave parts of your nails exposed, then paint blue flowers on the exposed areas.
Want to try a new nail design? Try zebra print nails! This bold look is perfect for anyone who wants to stand out. The classic black and white stripes are stylish and timeless. Get Creative with Your Nails Zebra print nails are a great canvas for your creativity. You can add bright colors or subtle accents to make your design unique. Try different nail shapes and lengths to add some extra flair. Zebra Print Nails are Always in Style Zebra print nails have been a fashion favorite for years. They can be dressed up or down, making them perfect for any occasion. Whether you like classic and elegant or bold and edgy, zebra print nails are a great choice. 18+ Try Zebra Print Nails at Home Don’t be afraid to try zebra print nails at home! With a few simple tools and some practice, you can achieve salon-quality results. So why wait? Start trying zebra print nails today and have fun with your new look! Black and White Zebra Print Nails Want a classic look? Try Black and White Zebra Print Nails! Paint black and white stripes on your nails. That’s it! You can also add some small details to make it special. Colorful Zebra Stripe Nails Want fun nails? Try Colorful Zebra Stripe Nails! Choose your favorite colors and paint stripes on your nails. You can also add some glitter or sparkles to make it pop! Glittery Zebra Print Nails Want shiny nails? Try Glittery Zebra Print Nails! Paint black and white stripes on your nails and add glitter on top. You can use different glitter colors to match your outfit. Neon Zebra Print Nails Want glowing nails? Try Neon Zebra Print Nails! Paint neon stripes on your nails and add glow-in-the-dark details. You’ll shine bright! Zebra Print Nail Art Design Want creative nails? Try Zebra Print Nail Art Design! Paint zebra stripes on your nails and add fun details like glitter, stickers, or rhinestones. You can make it unique and special! Striped Zebra Nails with Rhinestones For a playful twist, try striped zebra nails adorned with sparkling rhinestones. Start with a white base, then paint bold black stripes. Add a few rhinestones near the cuticle for a touch of glam that catches the light beautifully. Ombre Zebra Print Nails Create ombre zebra print nails by blending black and white shades. Start with white at the base and gradually blend in black towards the tips. Finish with zebra stripes for a chic, gradient effect that’s both stylish and fun. Zebra Print Stiletto Nails Zebra print stiletto nails are perfect for those who love dramatic designs. Shape your nails into sharp stilettos, then paint them with a classic zebra print. This fierce look is sure to make a statement wherever you go. Chrome Zebra Print Nails For a modern twist, go for chrome zebra print nails. Use a chrome polish to create a shiny base, then add zebra stripes with a matte black polish. The contrast between shiny and matte will give your nails a striking appearance. Holographic Zebra Print Nails Holographic zebra print nails are a fun way to stand out. Start with a holographic base coat, then layer on black zebra stripes. Zebra Print Nail Tips To create stunning zebra print nails, start with a base coat for a smooth finish. Use a thin brush to paint bold black stripes over a white or pastel background. This playful design adds a wild touch to your look. Bold Zebra Stripe Nails For bold zebra stripe nails, opt for a vibrant color palette. Paint thick black stripes over a bright base color like electric blue or hot pink. This eye-catching style is perfect for making a statement at any event. Pastel Zebra Print Nails If you prefer a softer look, pastel zebra print nails are ideal. Choose light shades like lavender or mint green as your base, and add delicate black stripes. This design is chic and perfect for a subtle yet stylish appearance. Zebra Print Nail Wraps For a quick and easy option, zebra print nail wraps are a game changer. Simply apply the wraps over your nails and seal with a top coat. This method offers a flawless zebra design without the hassle of painting. Sparkly Zebra Print Nails To add some glam, try sparkly zebra print nails. Start with a black base and add glittery stripes or use a sparkly top coat over your zebra design. This will give your nails a dazzling effect that shines bright. Zebra Print French Tip Nails Zebra Print French Tip Nails add a playful twist to the classic French manicure, combining chic elegance with personality. Geometric Zebra Print Nails Geometric Zebra Print Nails elevate the zebra theme with bold shapes and lines, creating a striking artistic statement. Metallic Zebra Print Nails Metallic Zebra Print Nails offer a glamorous take on the zebra design, perfect for making a statement on a night out. Zebra Print Nail Stickers Zebra Print Nail Stickers provide a quick and easy way to achieve the trendy look without the need for painting. 3D Zebra Print Nails 3D Zebra Print Nails feature unique textures and embellishments, making them a standout choice for those who love to experiment with nail art.
Want to make your nails look special? Try Glitter French Tip Nails Art! This design is a classic French tip with added glitter, making it perfect for anyone who wants to stand out. Make Your Nails Look Amazing with Glittery Tips Glitter French Tip Nails Art is a great way to make your nails look amazing. You can wear it to a special event or just because. It’s sleek, sophisticated, and sparkly! Choose Your Favorite Glitter Colors and Designs The best part about Glitter French Tip Nails Art is that you can choose your favorite glitter colors and designs. You can match your glitter to your outfit or go for a bold contrast. Either way, you’ll look great! 18 Try Glitter French Tip Nails Art at Home You can do Glitter French Tip Nails Art at home with a few simple steps and basic nail art supplies. So why wait? Make your nails sparkle and try Glitter French Tip Nails Art today! Purple Glitter French Tips Imagine a royal purple color with a touch of sparkle. That’s Purple Glitter French Tips! This fancy design is perfect if you want to look classy and stylish. The purple color and glitter look great together, creating a really royal look. Gold Glitter French Tips For a luxurious and glamorous look, Gold Glitter French Tips are the way to go. They’re like a regular French manicure, but with shiny gold glitter at the tips. This design is perfect for special events or just to add some sparkle to your everyday look. Silver Glitter French Tips If you want a more simple yet stylish look, Silver Glitter French Tips are a great option. The silver glitter adds a touch of class and elegance to the regular French manicure. This design is versatile and can be used for any occasion. Pink Glitter French Tips For a fun and girly look, Pink Glitter French Tips are the perfect choice. The soft pink color and sparkling glitter create a sweet and feminine design. This is a great option if you want to add some fun to your nail look. Diamond Glitter French Tips For the ultimate in luxury and glamour, Diamond Glitter French Tips are the way to go. The diamond-inspired glitter adds a touch of opulence and sophistication to the classic French manicure. This design is perfect for special occasions or just to treat yourself to something really special. Glittering Stripes French Tip Nails Want shiny nails? Try Glittering Stripes French Tip Nails! Paint stripes, add glitter, and finish with a French tip. Easy! Stiletto Glitter French Tip Nails Want long and pretty nails? Try Stiletto Glitter French Tip Nails! Paint your nails long, add glitter, and finish with a French tip. You’ll look great! Heart Glitter French Tip Nails Want cute nails? Try Heart Glitter French Tip Nails Art! Paint hearts, add glitter, and finish with a French tip. So sweet! Starry Night Glitter French Tip Nails Want nails that shine like stars? Try Starry Night Glitter French Tip Nails! Paint blue, add glittery stars, and finish with a French tip. Pretty! Neon Glitter French Tip Nails Want bright nails? Try Neon Glitter French Tip Nails! Paint neon colors, add glitter, and finish with a French tip. Fun! Holographic Glitter French Tip Nails For a sparkling twist on classic French tips, try holographic glitter! Start with your usual base coat, then paint the tips of your nails with a holographic polish. The glitter will catch the light and show off a rainbow of colors. Finish with a top coat to keep the sparkle lasting longer. Chrome Glitter French Tip Nails Art If you like a shiny, metallic look, chrome glitter is perfect. First, apply a base coat and then paint your tips with chrome polish. While the polish is still wet, add some chrome glitter on top. This will give your nails a cool, shiny effect. Seal everything with a top coat for extra shine. Rainbow Glitter French Tip Nails For a fun and colorful style, try rainbow glitter. Start with your regular French manicure base, then add a layer of rainbow glitter to the tips of your nails. The mix of colors will make your nails look bright and festive. Finish with a top coat to keep the glitter in place. Mermaid Glitter French Tip Nails For a magical mermaid look, use mermaid glitter. Paint your tips with a light, shimmering polish, then add some mermaid glitter on top. The glitter will give your nails a beautiful, scale-like shine. Seal with a top coat to keep the mermaid look intact. Unicorn Glitter French Tip Nails For a whimsical touch, use unicorn glitter. Start with a pastel base on your French tips, then sprinkle some unicorn glitter over the top. The glitter will give your nails a dreamy, magical look. Don’t forget to add a top coat to make sure your unicorn nails stay gorgeous. French Tip Glitter Bomb Nails For a fun and sparkly twist on classic French tips, try a glitter bomb! Start with your usual base coat, then apply a glittery polish to the tips of your nails. To make it extra sparkly, sprinkle more glitter on top while the polish is still wet. Finish with a top coat to keep all that glitter in place and make it last. Glittery Ombre French Tip Nails For a stylish ombre effect with a touch of glitter, start with a base coat and paint your tips with a glittery polish. Gradually blend the glitter down towards the base of your nails to create a smooth fade. This will give your nails a beautiful gradient look from sparkly tips to a softer shine. Seal everything with a top coat for a polished finish. Rose Gold Glitter French Tip Nails If you love a touch of elegance, rose gold glitter French tips are a great choice. Apply a base coat first, then add rose gold polish to your tips. The warm, shiny glitter will give your … Read more